Monday, December 20, 2010

Brownie Covered Oreos


I love baking at Christmas time. I have a list of new things to try and these were one of them. I made them to take into school one day last week. They were a hit as I left with an empty plate! These were fun to make and I even got Chad to help make them!! That is an accomplishment! :)

Brownie Covered Oreos
Source: Picky Palate

1 Brownie mix (or use your own brownie recipe)

1 package Oreos, I used the Holiday ones

White chocolate, melted for drizzle, or Wilton White frosting pen works great

White nonpariels Sprinkles

1. Preheat oven to 350 degrees F. Prepare brownie batter according to package directions. Leave in mixing bowl. Dip Oreos in brownie batter then place in bottom of cupcake tins that have been generously sprayed with cooking spray. Bake for 12-15 minutes, until brownies are cooked through (doesn’t take long). As soon as you remove, take a plastic knife and run along edges, (this is VERY important so you get the cookie out with brownies not stuck to pan

2. Let cool for 5 minutes, remove drizzle with melted white chocolate or the Wilton White icing pen, sprinkle with nonpariels and EAT! Enjoy

Makes entire package of Oreos

Chicken Stir Fry

This meal was delicious!! I love that it is so simple and so good. I have had it starred in my google reader for sometime now but just never got around to it. Now I could make this once a week!


Chicken Stir Fry
Source: Meal Planning Mommies


Ingredients
1-2 eggs, uncooked
1 lb chicken cut into pieces
1 tsp. garlic (1-2 garlic cloves)
1-2 cups rice cooked
vegetable oil
soy sauce (I used about 1/4 cup)
Frozen veggies

Begin to cook rice, according to the directions on the package. Pour 2-3 Tbs. oil into skillet and begin to heat oil. Toss in 1-2 eggs and scramble. Add 1-2 cloves garlic and chicken. Allow to cook until chicken is no longer pink on the inside. Throw in vegetables and cook for 6-8 minutes or until veggies are tender. Stir in rice and soy sauce. (more or less according to taste)

Tuesday, November 23, 2010

Herbed Rubbed Chicken

We are always looking for new ideas for dinner, aren't we? I have been in a rut the last couple of weeks and I was determined to step out of that rut this week. Since it is a shorter work week it gave me a little more motivation to get back in the kitchen.
The picture of this dish is what drew me to it. Sorry if mine doesn't do the same for you! :) Talk about easy! This dish is so simple. You just put everything in the pan and let it be! I had my kitchen cleaned up by the time this was ready to eat! I love that.
I think the flavor of this is wonderful. I love the angel hair pasta in it too!


Herbed Rubbed Chicken
Source: The Mess Pot from Annie's Eats
Ingredients:

8 oz. orzo pasta, uncooked ( I used a handful of Angel Hair)
2 chicken breasts, butterflied into halves (4 pieces total)
Salt and pepper
2 tsp. Herbes de Provence
2 tbsp. olive oil
1 shallot, finely chopped
2 cloves garlic, minced
1 (14.5 oz) can diced tomatoes, with juices
2 cups broccoli florets
½ cup heavy cream
1/3 cup freshly grated Parmesan cheese

Directions:

Bring a saucepan of salted water to boil. Add the orzo and cook until tender but still firm to the bite, about 10 minutes. Drain the pasta, reserving ½ cup of the pasta water.

Season both sides of the chicken breast halves with salt and pepper. Sprinkle evenly with the Herbes de Provence. Heat the olive oil in a 12- or 14-inch skillet over medium-high heat. Add the chicken breast halves to the pan and cook about 3 minutes per side, until golden brown.

Reduce the heat to medium, add the shallot to the pan and sauté 2-3 minutes. Add the garlic and sauté an additional minute, until fragrant. Add the diced tomatoes with juices and the broccoli florets to the pan, scraping the bottom of the pan to remove any browned bits. Bring to a boil, then reduce the heat to simmer over medium-low. Cover and let cook until the broccoli florets are crisp-tender, about 10 minutes. Stir in the cooked orzo, heavy cream and Parmesan cheese. Mix until well blended and the cheese has melted. If necessary, add some of the reserved pasta water to smooth out the sauce. Season to taste with salt and pepper. Serve immediately.

Sunday, November 21, 2010

Pizza Puffs


Most Sunday nights we don't usually want a big dinner. I thought these pizza puffs would be just right for our dinner tonight. They are so easy to put together which makes it another plus. I definitely want to make these again for maybe a football night.

Pizza Puffs
Source: Stephanie Cooks

Ingredients:
3/4 cup flour
3/4 teaspoon baking powder
3/4 cup whole milk
1 egg, lightly beaten
1/2 tsp. Italian seasoning
1/4 tsp. garlic/onion powder blend
4 ounces mozzarella cheese, shredded (about 1 cup)
1/2 cup pizza sauce


Directions:Preheat oven to 375o. Grease a 24-cup mini muffin pan.

In a large bowl, whisk together the flour and baking powder; stir in the milk and egg.

Stir in the cheese and seasonings and let stand for 10 minutes.

Stir the batter and divide among the mini-muffin cups. (I used a regualr size muffin tin) Bake until puffed and golden, about 25 minutes.

Microwave the pizza sauce until warmed through. Serve the puffs with the pizza sauce for dipping.

Monday, November 1, 2010

Cornbread

My grandmother was a great, true southern cook. She passed away a little over a year ago and I still have urges to call her to tell her about my newest cooking adventure. Tonight was one of those nights.
I was able to have many of my Grandma's cooking tools. Tonight I used her cast iron skillet to make this corn bread. I have never cooked with a cast iron skillet and I was excited to try something new.
I made chili for dinner tonight and decided to make cornbread to go with it. I had some buttermilk to use up so I searched on allrecipes.com. This was a simple recipe and the cornbread came out great. Really moist and sweet.


Buttermilk Corn Bread Recipe
Source: All Recipes

1 1/4 cups cornmeal
1 cup all-purpose flour
2/3 cup packed brown sugar
1/3 cup sugar
1 teaspoon baking soda
1/2 teaspoon salt
1 egg
1 cup buttermilk
3/4 cup vegetable oil


Directions
1.In a mixing bowl, combine cornmeal, flour, sugars, baking soda and salt. In another bowl, beat the egg, buttermilk and oil; stir into dry ingredients just until moistened. Pour into a greased 9-in. round or square baking pan (pan will be full). Bake at 425 degrees F for 20-25 minutes or until a toothpick inserted near the center comes out clean. Cool on a wire rack for 5 minutes. Serve warm

Saturday, October 30, 2010

Cinnamon Swirl Bread


I never used to eat breakfast until I started working. I always try to have something different each week. I also don't give myself a lot of time to eat breakfast so it has to be something I grab and go. This bread fits my criteria! It is also one of the easiest things I have made before. It took me probably 10 minutes to make and that includes pulling out all of my ingredients!
Chad and I each had a slice as a snack and it was delicious. The cinnamon flavor was great and the bread was moist. I will definitely make this often since it is so easy and delicious.

Cinnamon Swirl Bread
Source: Sing For Your Supper
1/3 cup brown sugar
2 teaspoons ground cinnamon
1 cup white sugar
2 cups all-purpose flour
1 teaspoon baking powder
1/2 teaspoon salt
1 egg
1 cup buttermilk
1 teaspoon vanilla extract
1/3 cup cooking oil

Preheat oven to 350 degrees. Grease the bottom and sides of a 9″x5″x3″ loaf pan. Combine the brown sugar and cinnamon. Set aside.

Combine the 1 cup of white sugar, flour, baking powder and salt in a bowl or mixer bowl. In a separate bowl, beat egg. Stir in buttermilk, vanilla and oil. Make a well in the flour mixture and add the egg/buttermilk mixture. Stir just until mixed. Do not over-mix.
Pour half of the batter into loaf pan. Sprinkle with half of the cinnamon mixture. Repeat With a wide rubber scraper or spatula, swirl mixtures together with a down and up circular motion.
Bake for 40 to 50 minutes or until done. Cool in pan for about 10 minutes. Remove from pan and cool completely on a wire rack.

Saturday, September 25, 2010

Peach Cobbler

My husband's Grandpa has been in bad health for the last few months. I have been giving him some of my jars of jam. He really enjoys it and why not give him great food to enjoy right now.

I thought I would also bring him a peach cobbler to enjoy before the end of the season. I searched on Food Network's website for a peach cobbler recipe. I pretty much already knew the best recipe would come from Paula Deen. I first found a video of her making this cobbler. The video shows just how easy this recipe is. Make sure you follow the exact directions she gives. Especially making sure you use self rising flour or add baking powder to your flour if it isn't self rising.
This was delicious and I love the crust. I will definitely use this recipe again and use different fruits as well.

The Lady and Sons Peach Cobbler


Ingredients
1/2 cup (1 stick) butter
3/4 cup sugar
3/4 cup self-rising flour
1 cup milk
1 (28-ounce) can sliced peaches in heavy syrup, un-drained (use fresh peaches if available; see note*)
Cinnamon, for sprinkling, optional
Vanilla ice cream or fresh whipped cream, for serving
Directions
*If they are available, by all means use fresh peaches. In a saucepan, mix 2 cups fresh peach slices with one cup sugar and one cup water. Bring the mixture to a boil and then simmer for about 10 minutes. Stir often, making sure the sugar is completely dissolved. Substitute this for the canned peaches.

*Cook's Note: The most important part of this dish is not stirring the mixture.

Preheat oven to 350 degrees F.

Put butter in a 13 by 9 by 2-inch baking dish and place in the oven to melt. Stir sugar and flour together and mix well. Slowly add milk and continue stirring to prevent the batter from lumping.

Being careful not to burn yourself, remove hot baking dish containing melted butter from oven; pour batter directly over butter in baking dish. Do not stir.

Spoon fruit on top of batter, then gently pour syrup on top. Do not stir. Sprinkle cinnamon on top of batter, if using. (The most important part of this dish is not stirring the mixture at this point in the recipe.)

Bake for 30 to 45 minutes or until golden brown. Your batter will rise above your fruit, producing the most wonderful of crusts. Serve warm with vanilla ice cream or fresh whipped cream.


Monday, August 30, 2010

Peach Crisp

I picked up some peaches on sale today with hopes to just slice them up and enjoy with my breakfast or lunch. Well as I waiting on my husband to get home so I could start dinner, I was checking out the What's Cooking board. Of course someone had to ask for a peach cobbler recipe which got me thinking :)

I searched around allrecipes.com for something I had all the ingredients for and was super simple.

This recipe gave me all of that. I put this whole thing together and had it all cleaned up in about 15 minutes. That is my kind of dessert recipe!

Peach Crisp

6 peaches- peeled,pitted and sliced
1/4 tsp almond extract (I was out so I just used vanilla)
1/2 cup AP flour
1/2 cup sugar
2 tbs brown sugar
1/2 tsp cinnamon
1/8 tsp salt
1/4 cup butter

Preheat the oven to 375 degrees and grease an 8 inch square baking pan.

Place the peaches in the bottom of the baking dish and sprinkle with the almondy extract.

In a bowl, combine the flour, sugar, brown sugar, cinnamon and salt. Cut the butter into the flour using a pastry cutter until the mixture resmbles crumbs.

Sprinkle the flour mixture in an even layer over the top of the peaches and bake in the pre-heated oven for 45 minutes, until the peaches are bubbling and the top is browned.

Grilled Honey Balsamic Chicken

I left school today with absolutely no energy. I really wanted to push this dinner to another night and instead just grab some fast food. On my way home I had to convince myself to stick with dinner and get it done. Alas, I stuck with it and also whipped up a dessert! What???

I am so happy I didn't give in and was able to try something new. This chicken is delicious. It received compliments from my husband which is always a plus! I served this with mashed potatoes and corn. (It was supposed to be corn on the cob but the grocery had not a single good looking cob!)

Enoy such a simple and delicious meal!


Grilled Honey Balsamic Chicken
Source: Delish

1 1/2 lbs. chicken breast
2 tsp olive oil
2 tsp balsamic vinegar
2 tsp honey
1/2 tsp garlic salt
salt and pepper to taste

Pound chicken to even thickness. Approximately 1/2inch to 3/4 inch thickness. Season both sides with salt and pepper. In large dish (or ziploc bag) combine oil, balsamic vinegar, honey and garlic salt. Add chicken and allow to marinate 2-3 hours or overnight. Grill until cooked through. Let rest for 5 minutes before serving.

Saturday, August 21, 2010

Pizza Baked Spaghetti

I took dinner to some friends last night that just had a baby. This meal was one of the easiest meals I've put together! I made pizza baked spaghetti, corn on the cob, garlic bread and dessert.

Pizza Baked Spaghetti
Source: The Burton's Block

Ingredients:
Spaghetti (I used an entire box which made a large casserole pan)
Jar of spaghetti sauce
1 Bag of mozzarella cheese
Pepperonis

Cook the spaghetti then layer ingredients in a greased pan.
Noodles, sauce, cheese pepperoni
Bake at 375 for 10 minutes.
Enjoy!

Wednesday, July 14, 2010

Parmesan Orzo


I am always on the search for side dishes besides our usual corn or green beans.


This orzo was simple and delicious which made it perfect to add to out list of sides.

Source:


3 tbs butter

1-1/2 cups uncooked orzo pasta

1-1/2 cans (14.5 ounce) chicken broth

3/4 cup grated parmesan cheese

1/4 cup and 2 tablesoons chopped fresh basil

salt and pepper to taste

3 tbs chopped fresh basil


Directions:

Melt butter in heavy skillet over medium-high heat. Stir in orzo and saute until lightly browned.

Stir in chicken stock and bring to boil. Cover. Reduce heat and simmer until orzo is tender and liquid is absorbed, about 15-20 minutes.

Mix in parmesan cheese and basil. Season with salt and pepper. Transfew to shallow bowl. Garnish with basil sprigs.

Strawberrry Jam

A few weeks ago some friends and I got together to make jam! My friend Liz had made it in the past and was willing to show us how it's done. I am so excited I now know how to do this. I feel like it's something I can now cross off my cooking to-do list!


I'll admit before we made this jam I didn't actually really eat much jam or jelly. I mean I kept a jar of grape jelly in the fridge to use at times but that's about it. Well let me tell you in the 3 weeks since we've made this I am almost through my first jar. I have been looking for ideas on how to use it besides pb&j and toast.

I would encourage you to try this sometime it was so easy!

I don't have a recipe for this. We just followed the directions on the pectin package.

Here is my version of the steps.

Mash your strawberries- We used a potato maser and pastry cutter, it would be much easier to use a food processer just don't puree the strawberries.

Add the pectin to the strawberries.

Boil the strawberries.
Once it reaches a rolling boil add the sugar and stir on the stove for one minute.

Remove from the stove and funnel the jam into jars.
*You will probably want to skim the foam off
Close the jars and place in boiling water for 10 minutes and TA-Da you have jam!

Saturday, June 19, 2010

Chewy Chocolate Cookies

Another baby was recently born so I took a meal to the family. For their meal I made stuffed shells, green beans, strawberry salad and these cookies.

I made enough to keep a couple for Chad. I don't care for chocolate but I thought it would be yummy treat for him. To my surprise they were!! He actually commented how much he liked these cookies! They were just as easy as any chocolate chip cookie.

The recipe came from a cookie cookbook my SIL gave me for Christmas. I have many other cookies bookmarked to try!

Chewy Chocolate Cookies
Source: 500 Cookies

6 oz. bittersweet chocolate, chopped
1/4 cup (1/2 stick) sweet butter
1/3 cup AP flour
1/4 tsp. baking powder
Pinch of Salt
2 eggs
1 1/4 cups superfine sugar
1 tsp. vanilla
4 oz. semisweet chocolate, chopped coarse

Preheat over to 350. Line 2 baking sheets with parchment.

Melt the bittersweet chocolate and butter. Allow to cool slightly. Sift the flour, baking powder and salt together. In another bowl, beat the eggs, sugar, and vanilla extract until thick and pale. Stir in the melted chocolate into the eggs and sugar, followed by the flour and semeisweet chocolate chunks.

Drop tablespoons of mixture onto baking sheets and bake for 8 to 10 minutes. Slide the parchment onto wire racks.

When completely cool, store in an airtight container for 2 to 3 days.

Monday, June 14, 2010

Blueberry Pancakes

This summer has been great so far. I'm not committed to anything and I have just been taking it easy. One thing I did decide to do is preparing myself for next school year. I love to cook and most nights I have no problem making dinner but there are times when I'm stumped on what to have or I'm just too tired to make anything.
We were given a freezer recently so I am doing my best to make meals this summer and freeze them so we can have more wholesome meals on those tiresome nights rather than frozen pizza.

Along with dinner I get sick of deciding what to have for breakfast. I also give myself barely anytime to whip anything up in the mornings. I decided to make these pancakes for breakfast today and then freeze the rest for the school year. All I will have to do in the mornings is pop them in the microwave! My kind of breakfast :)


Blueberry Pancakes
Source: Joelen's Culinary Adventures

2 cups all purpose flour
2 tablespoons sugar
1/2 teaspoon salt
1 teaspoon baking powder
1/2 teaspoon baking soda
2 cups buttermilk
1/4 cup sour cream
2 large eggs
3 tablespoons butter, melted and slightly cooled
1 cup frozen or fresh blueberries
1-2 teaspoons vegetable oil


In a medium bowl, combine all the dry ingredients (flour, sugar, sugar, salt, baking powder and baking soda). Use a whisk to blend together. In a 4 cup measuring cup or another medium bowl, combine the remaining ingredients except the blueberries and vegetable oil (buttermilk, sour cream, eggs and melted butter) with a whisk. Make a well in the center of the dry ingredients and pour in the wet ingredients. Stir the wet mixture in gently with the dry ingredients just until it starts to fully combine. The batter will be a bit lumpy. If you see streaks of flour, it's okay, but just don't overmix! Let the lumpy batter sit aside for about 10 minutes before you start cooking.

To prepare for cooking, use a 10- or 12- inch nonstick skillet and heat 1 teaspoon of oil or spray with cooking spray.


Heat a 12-inch nonstick skillet over medium heat and spray with cooking spray enough to coat the bottom. Once the pan gets hot, carefully wipe some off the cooking spray from the pan with a pape towel. I like using a large scoop or even a small soup ladle to measure my pancake batter. You can also use a 1/4 cup measure if you prefer. Take a scoop/ladle or 1/4 cup full of batter and pour into your hot skillet. You should be able to fit 4 small pancakes in a pan, but fit whatever works for you. Top the pancakes with a sprinkle of blueberries once you pour them into the pan.

Cook the pancakes until the edges start to bubble, which means it's starting to set. Take a peek at the bottom of the pancake to see if it's golden brown and that the pancakes start to form bubbles that break on the top of the pancake. At this point, you can flip the pancakes with a spatula. Continue to cook the second side until golden brown.

Serve the pancakes immediately or to keep warm, transfer them onto a wire rack set in a 200 degree oven.

Monday, June 7, 2010

Spaghetti Sauce

I am loving my summer vacation so far. I have a list of new recipes to try and a list of things to make to stock up my freezer!
Tonight I decided to try a new spaghetti sauce recipe. I had this recipe starred in my google reader and the picture is what drew me to trying this. I was really impressed with this sauce. It was delicious and so easy. It does not take much time except for chopping up your veggies which you could always do ahead of time. I hope you take the time to make this it is so much better than a jar of sauce.

Spaghetti Sauce
Source: Carrie's Sweet Life

•1 lb. Hamburger
•1 large onion diced
•1 green pepper diced
•dash of cyan pepper
•1 lg. Can of sliced tomato
•1 med. can of tomato sauce
•1 sm. can of tomato paste
•Thin with tomato juice
•Bay leaves
•Sweet Basil
•Oregano
•Hot Sauce
Brown the hamburger, onion and green peper together in a pan, drain off excess fat. In large pot add meat and veggies, tomato products and seasonings to taste. Simmer on very low heat for around 10 hours(I let mine simmer four about 30 minutes and it still tasted great) Add salt and pepper to taste.

Monday, May 24, 2010

Lemonade Pie

I recently took dinner to a family who just welcomed a new baby boy! For their dessert I chose this pie. Here in Indy our temps went from cold to HOT! I thought this dessert would be perfect to help stay cool!

Lemonade Pie
Source: There's No Place Like Home

Mix 1 tub of cool whip
1 can of Eagle Brand sweetened condensed milk
and 6 oz of frozen lemonade (or you can use limeade too)
After it is mixed together, put it in a baked pie shell( I used a frozen pie crust) and freeze it overnight.

Like suggested on There's No Place Like home. I made two pies as well so we could enjoy our own pie!

Taco Pie

Summer break is finally here! I have not cooked in my kitchen in two weeks. The last three weeks of school I had something to do each night! I am so happy for summer to be here and the busyness to be done! I have a list of recipes to try and old favorites to get to as well.
For dinner tonight I chose this taco pie. Super easy and super delicious! I found this recipe from Meal Planning Mommies and as their site shows it is also a very inexpensive meal for your family. I hope you enjoy!


Taco Pie
Source: Meal Planning Mommies

Here is what you need:

1 tube crescent rolls
1 pound hamburger
1 package taco seasoning
1/2 cup water
2 cups sour cream
1 cup cheddar cheese
2 cups crushed taco chips(Fritos)

Step 1: Brown hamburger, drain fat and then add taco seasoning and 1/2 cup of water. Cook until most of the water has evaporated.
Step 2: Put crescent rolls along the bottom and up the sides of a 9x9 dish. Sealing around the edges. (Instead of buying crescent rolls I bought "crescent creations", it is basically the crescent dough in a sheet instead of triangles)
Step 3: Place 1 cup taco chips on crescent rolls
Step 4: Put meat on top of crushed chips
Step 5: Put 2 cups of sour cream on top of meat and spread around.
Step 6: Place 1 cup cheddar cheese on top of sour cream
Step 7: BAKE AT 350 DEGREES FOR 20 MINUTES.
Step 8: Take out and add 1 cup of crushed taco chips, then bake for 5 more minutes.

Sunday, May 9, 2010

Chocolate Cheesecake

This is my second dessert I made for mother's day with my mom in mind. I will say I have never made a cheesecake!!! I will be whipping up some more from now on. I love how this recipe uses the food processer to mix everything. It made it so easy. I actually made both of my desserts simultaneously and it wasn't difficult at all.


Low & Lush Chocolate Cheesecake
Source: Joelen's Culinary Adventures
recipe adapted from Dorie Greenspan
Filling:
1 1/2 pounds (three 8-ounce packages) cream cheese, at room temperature
1/2 cup sugar
3 large eggs, preferably at room temperature
1 teaspoon pure vanilla extract
Pinch of salt
4 ounces bittersweet chocolate, melted and slightly cooled
1 graham cracker pie crust - homemade or store bought


Preheat the oven to 350 degrees.

Cut each bar of cream cheese into quarters and toss the pieces into a food processor, along with the sugar. Process, scraping down the bowl 2 or 3 times, for a full 2 minutes. You’ll see how dramatically the cream cheese changes; it will look like white velvet at the end of its beating. Add the eggs, vanilla and salt and give the batter 4 longish pulses, the scrape down the bowl and pulse 2 more times. Pour in the chocolate and pulse and scrape a few times to blend the batter well.

Remove the bowl from the processor and rap it hard on the counter a couple of times to de-bubble the batter. Scrape the batter into your prepared graham cracker crust.

Bake the cheesecake in the preheated 350 degree oven for 35 to 40 minutes if you are using a large store bought graham cracker crust or a 9-inch pan or 45 to 50 minutes if you are using a standard store bought graham cracker crust or an 8 1/2-inch pan. The top should be puffed and set, but if you tap the pan gently, the center of the cake will still be a little shaky–that’s just fine. Transfer the pan to a cooling rack and allow the cheesecake to cool to room temperature, then refrigerate for at least 8 hours or for up to 3 days. Garnish with whipped cream and chocolate, if desired, before serving.

Cinnamon Cupcakes

For mother's day today I made two desserts with my mom and MIL in mind. These cinnamon cupcakes were for my mother-in-law. She enjoys cinnamon treats so I thought these would be perfect.
They were extremely easy and tasted great.

I just realized I didn't get any pictures of my desserts!! Just know they looked and tasted delicious.:)

Cinnamon Cupcakes
Source: Loves to Eat

Ingredients:

For the cake:

1 cup all-purpose flour

¾ tsp. baking powder

1 tsp. ground cinnamon

1/8 tsp. salt

½ cup whole milk

4 tbsp. unsalted butter, at room temperature

2 large eggs

¾ cup plus 2 tbsp. sugar

1 tsp. grated orange zest

½ tsp. vanilla extract


For the frosting:

½ cup unsalted butter, at room temperature

8 oz. cream cheese, at room temperature

2-3 cups powdered sugar, sifted

1 tsp. vanilla extract

2 tsp. ground cinnamon


Directions:

Preheat the oven to 350° F. Line a 12-cup cupcake pan with paper liners. Sift the flour, baking powder, cinnamon and salt in a small bowl. Stir milk and butter in a small saucepan over low heat just until butter melts; set aside.


In the bowl of a stand mixer, beat eggs and sugar until thick enough for the batter to fall in a heavy ribbon when the beater is lifted, about 5 minutes. Beat in orange peel and vanilla. Add the flour mixture; beat just until blended. Add in milk mixture slowly. Divide batter evenly between cupcake liners. Bake until a tester inserted in the center comes out clean, about 16-18 minutes. Allow to cool in pan for 5-10 minutes, then transfer to a wire rack and allow to cool completely.


To make the frosting, cream the butter and the cream cheese in the bowl of a stand mixer until very smooth. Scrape down the sides and bottom of the bowl to ensure even mixing. Add the vanilla extract and cinnamon and mix until incorporated. Slowly add the powdered sugar, and keep adding until you reach the desired consistency and sweetness. Frost cooled cupcakes.

Source: adapted from A Southern Grace

Tuesday, May 4, 2010

Cheddar & Cracker Chicken

Jolen did it again! She made another meal (which she found from Real Simple) I can add to my list! This recipe takes barely anytime to put together. With the cracker cheddar mix you can always make enough to have extra left over for another night. (Just be sure to set aside what you want to save before you dip the raw chicken into it.)

Cheddar and Cracker Chicken
Source: Joelen's Culinary Adventures

16 buttery crackers (such as Ritz), crushed (about 3⁄4 cup)
6 ounces sharp Cheddar, grated
1 clove garlic, finely chopped
1-2 stalks scallions, thinly sliced
kosher salt and black pepper
4 6-ounce boneless, skinless chicken breasts
4 tablespoons unsalted butter, melted

Heat oven to 350° F. In a bowl, combine the crackers, cheese, garlic, scallions and ¼ teaspoon each salt and pepper.

Pound the chicken to about 1/4 - 1/2 inch thickeness with a meat mallet. Dip the pounded chicken in the butter, then in the cracker mixture, pressing gently to help it adhere, and place on a foil-lined baking sheet.

Sprinkle any remaining cracker mixture on the chicken and drizzle with any remaining butter. Bake until the chicken is golden brown and cooked through, 15 to 20 minutes.

Beef and Broccoli

I took another step in my cooking journey! I want to be more adventurous but yet I haven't put those words into action. Now when I say I cook Mexican or Italian cuisine I'm talking spaghetti and tacos! I finally stepped out of those genres and stepped into asian cuisine!
I know I'm a wimp. What was I thinking, this was so easy I don't know why I get so nervous to try something different!
Thanks to Joeleen for such a great recipe. This really was easy and of course delicious!


Beef & Broccoli
original Joelen recipe

Marinade:
2 tablespoons brown sugar
1/3 cup soy sauce (regular or low sodium)
1/2 cup water
1/2 teaspoon garlic powder
1 lb boneless round steak, cut into thin strips

2 tablespoons vegetable or canola oil
1 small onion, diced
2 cloves garlic, minced
1/4 cup water
1 tablespoon oyster sauce (I searched and searched for this but could not find it in my grocery!)
4 cups fresh broccoli florets
salt & pepper to taste


In a bowl, combine the sugar, soy sauce, water, garlic powder, and beef. Cover with plastic wrap and chill for at least 3 hours or overnight.

When ready to prepare, warm up a large skillet over medium high heat. Add the oil to heat up. Once hot, saute the garlic and onion until softened.

Add the marinated beef and marinade to the skillet. Saute the beef until cooked through, about 5-7 minutes.

Add the water, oyster sauce and broccoli florets. Let it come to a boil and allow the liquid to reduce and the broccoli cooks from the steam.


When the liquid has reduced almost completely, season to taste with salt and pepper. Remove from heat and serve over steamed rice or noodles

Friday, April 9, 2010

A fun oreo Easter treat.

I found this super EASY and cute Easter treat over on Picky Palate. I definitely will be using this idea for other holidays and celebrations.


White Fudge Dipped Oreo Easter Cookies
Source: Picky Palate
Bag of Oreo Cookies

Bag of Wilton White Candy Melts (I found mine at WalMart)

Food Decorating Paste or Food Coloring (red, yellow, blue and green)

White nonpareils Sprinkles

1. Take half of the Oreos out of the package and set on plate so they are ready to go. Melt candy according to package directions until smooth. Divide white chocolate into 4 separate bowls then add paste or food coloring until desired color is reached. Start with just a tiny drop so you get pastels Stir then dip tops of oreos in chocolate. Use spoon to spread evenly. Sprinkle with sprinkles then place onto foil, parchment or wax paper to dry. Continue dipping until Oreos and chocolate is used up. Serve room temperature or chilled, Enjoy!!

Easter Lunch!

We had a wonderful Easter. Chad and I had my parents and my aunt and uncle over for lunch after church. I was so excited to entertain this Easter. My grandma gave me most of her Easter decorations a few years ago and I was determined to really put them to use. I only wish she could have seen it. She was always such a great entertainer and I am sure that's where I get my love for it from!
Here is the table.


For lunch we had a delicious spinach and strawberry salad, Ham, Macaroni, Asparagus and of course Sister Schubert rolls!
The macaroni I made is from this post.
The asparagus is a recipe from one of my aunts.


For dessert we had chocolate pie and strawberry shortcake.


Monday, March 29, 2010

Marshmallow Brownies

I am finally on Spring Break!! Woohoo! At school on the last day before break we always have a cookout! It's great with tons of food to celebrate the year almost being over :) I brought these super simple delicious brownies!! I don't care for chocolate (I know shocking!!!) so I didn't eat any but these were devoured so I think they were pretty good.

Marshmallow Swirl Brownies
Source: Lauren's Kitchen
Ingredients

•Cooking Spray
•1 pkg family-sized fudge brownie mix (plus whatever ingredients are listed on the box)
•1 (7 oz) jar marshmallow creme
•1/3 cup chocolate frosting

Heat oven to 350. Prepare brownies as indicated on package with oil, water and eggs. Cool completely.

Spread a thin layer of marshmallow creme over brownies. Place frosting in microwave-safe bowl and microwave on high for 10-20 seconds. Stir until smooth. Drizzle frosting over marshmallow creme. Swirl with knife.

Refrigerate 15 minutes. To cut cleanly, spray a knife with non-stick cooking spray as needed. Store loosely covered in the refrigerator.

Saturday, March 20, 2010

Blueberry Scones


I've never made a scone before. I have many starred in my google reader to make but I always had in the back of my mind that they were hard to make. What was I thinking?
These are actually really easy! I will definitely start going through the list of other flavors to make!

Blueberry Scones
Source: Annie's Eats

Ingredients:
8 tbsp. (1 stick) unsalted butter, frozen whole
1½ cups (7½ oz.) fresh blueberries
½ cup whole milk
½ cup sour cream
2 cups (10 oz.) all-purpose flour, plus more for dusting the work surface
½ cup sugar, plus extra for sprinkling
2 tsp. baking powder
¼ tsp. baking soda
½ tsp. salt
1 tsp. finely grated lemon zest
2 tbsp. unsalted butter, melted

Directions:
Adjust an oven rack to middle position and preheat to 425˚ F. Grate the frozen butter on the holes of a large box grater. (Like Annie did I used my food processer for this.) Place the blueberries in the freezer until needed.

Whisk together the milk and sour cream in a medium bowl; refrigerate until needed. Combine the flour, ½ cup sugar, baking powder, baking soda, salt and lemon zest in a medium mixing bowl. Whisk to combine. Add the grated butter to the flour mixture and toss with fingers until thoroughly coated.

Add the milk mixture to the dry ingredients and fold with a spatula just until combined. Transfer the dough to a generously floured work surface. Dust the top of the dough with flour, and knead with well floured hands, 6-8 times, just until the dough holds together in a ragged ball. Add small amounts of flour as needed to prevent sticking.

Roll the dough into a 12-inch square. Fold the dough into thirds like a business letter (a dough scraper really helps with these steps). Fold the short ends of the dough into the center in thirds, to form an approximate 4-inch square. Transfer the dough to a plate lightly dusted with flour and chill in the freezer for 5 minutes.

Return the dough to the floured work surface and roll into an approximately 12-inch square again. Sprinkle the blueberries evenly over the surface of the dough, and gently press down so that they are slightly embedded in the dough surface. Using a dough scraper, roll the dough up to form a tight log. Lay the log seam side down and press the the log into a 12 by 4-inch rectangle. Using a sharp, floured knife, cut the rectangle crosswise into 4 equal rectangles. Cut each rectangle diagonally to form 2 triangles. Transfer to a parchment lined baking sheet.

Brush the tops of the scones with melted butter and sprinkle lightly with sugar. (If freezing ahead of time, flash freeze on the baking sheet for 20 minutes, then wrap individually and store in a freezer bag until needed.) Bake until the tops and bottoms are golden brown, 18-25 minutes. Transfer to a wire rack and let cool at least 10 minutes before serving.

Source: adapted from Entertaining from Cook’s Illustrated, Spring 2009

Monday, March 15, 2010

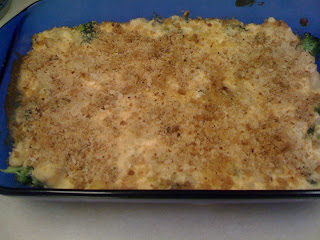
Zesty Chicken and Broccoli Casserole


This was on the menu for last week but unfortunately I got sick! Thankfully all is well now and I was able to make this tonight. This is a great recipe. I'm also happy it included borccoli! Chad won't eat it usually but mixed in with something he is more likely to like it :)
Give it a try!

Zesty Chicken and Broccoli Casserole
Source: A Taste of Home Cooking

3-4 broccoli crowns, cut into bite-size pieces
3/4 cup chopped onion (about 1/2 medium)
2 tablespoons oil
3 chicken breasts, cut into bite-size pieces
4 tablespoons butter, divided
1 1/2 cups milk
2 1/2 tablespoons flour
1/2 teaspoon salt
1/4 teaspoon pepper
Pinch of nutmeg
1 cup shredded sharp cheddar cheese
1/2 cup cream cheese, softened
1 cup mayonnaise (or sour cream)
1 (8-ounce) can sliced water chestnuts, drained
3/4 cup panko (Japanese breadcrumbs)

Preheat oven to 375°.

Cook broccoli and onion in a pan with 1 tablespoon oil until broccoli is just tender. Arrange in an even layer in an 11 x 7-inch baking dish coated with butter; set aside. Add second tablespoon oil to pan and cook chicken until golden-brown. Arrange on top of broccoli mixture.

Melt two tablespoons butter in empty pan over medium-high heat then add flour. Cook for 1 minute, then add milk, salt, pepper and nutmeg; bring to a boil. Cook 1 minute or until thick, whisking constantly. Remove from heat. Add cheddar and cream cheeses; stir until smooth. Stir in mayonnaise and water chestnuts. Spoon cheese mixture evenly over broccoli.

Place panko in a small bowl. Drizzle with remaining two tablespoons melted butter, and toss. Sprinkle breadcrumb mixture evenly over broccoli mixture. Bake for 25 minutes or until mixture begins to bubble and breadcrumbs brown.

Monday, March 8, 2010

Cheesy Potato Soup

I finally made a good potato soup! Chad loves potato soup from O'Charley's and I have been trying to make his grandma's recipe but it never came out right. I thought I would try this recipe. It seemed easy enough and it was. It turned out great :) The only drawback was that it took some time to chop everything. I didn't even think about this when planning when to eat dinner so we ate slightly later than planned but it's ok we still ate :) I know I could have chopped my veggies when I brought home everything from the grocery but I was in a rush that day.
Definitely try this recipe!

Cheesy Potato Soup
Source: Crystal's Creations

Ingredients -
8-10 medium Red Potatoes
Water to cover potatoes
1 Green Pepper
1 large Onion
2 cloves Garlic, minced
1/2 package Bacon, cut into 1" pieces
1 cup Milk
1/3 package Velveeta, cut into 1" cubes
1 teaspoon Celery Seed (I omitted)
Salt and Pepper, to taste


Preparation:
Quarter and cut potatoes into small pieces. ( I cut mine into sticks) You can peel them or scrub and leave skin on. You may leave the skin on for red or new potatoes, and peel if using others.Place potatoes in large pot and cover with water; add salt. Boil, covered until tender.

While potatoes are boiling, place bacon, onion, garlic, and green pepper in another large pot and sauté until bacon is cooked, green peppers are tender, and onions are clear.

Drain bacon fat, except for about 1 tablespoon. Add celery seed, salt, and ground pepper and sauté for 1 more minute.

Add sautéd ingredients to undrained boiled potatoes. Turn heat to medium.

Add Velveeta and stir soup until cheese melts. Add milk, and stirring constantly, heat until soup is hot.

Be careful not to burn it.

Sunday, February 14, 2010

Valentine Treats


I love any excuse to make some sweet treats for others.

To make the little heart candies I used a silicone ice cube tray from the dollar bin at Target. I melted the chocolate in the microwave and then spooned it into the mold. I put the sprinkles on and let them harden back up in the fridge.

The candy cane hearts were pretty easy. I trimmed the candy cane down and formed the heart. Using parchemnt paper on a cookie sheet lay out the hearts. Put them in a 350 oven for about 8 minutes or so. I just kept my eye on them constantly! When they come out place the stick in the middle!

The last treat I made were brownies. I used a box mix and baked it in a 9x13 pan. After they cooled for a bit I used various size cookie cutters to form the hearts. I then melted some icing in the microwave and spooned it over the brownies. As you can tell in the picture there were more brownies on this plate but they were quickly devoured!

Sunday, January 31, 2010

More Blueberry Muffins


Don't these muffins look delicious? Ok I'm sure with some better photography skills they would really look as good as they taste!
I have made so many different blueberry muffin recipes! These muffins were just as great as all the others I have made. Now I have so many options to choose from when I make these again :)
I did not wait till breakfast tomorrow morning to taste these. I have already scarfed down 2!

Enjoy!!

Blueberry Streusel Muffins
Source: Vintage Victuals

1/3 cup sugar
1/4 cup butter, softened
1 egg
2 1/3 cups flour
4 teaspoons baking powder
1/2 teaspoon salt
1 cup milk
1 teaspoon vanilla
1 1/2 cups blueberries

1/2 cup sugar
1/3 cup flour
1/2 teaspoon cinnamon
1/4 cup butter, softened

Preheat your oven to 375 degrees, and grease or line 18 muffin cups.

In an electric mixer bowl, cream sugar and butter until light and fluffy. Add egg and beat until well-combined.

In a seperate bowl, combine flour, baking powder and salt. Add to creamed mixture alternately with milk, stirring well after each addition.

Finally, stir in vanilla and blueberries. Spoon batter into greased or lined muffin cups, filling two-thirds of the way full.

For topping, combine the sugar, flour, and teaspoon cinnamon. Cut in the butter with a fork or pastry blender until mixture resembles crumbs. Sprinkle on top of muffin batter.

Bake at 375 degrees for 25 – 30 minutes or until golden brown. Yield ~ 18 muffins

Saturday, January 30, 2010

Baked Lemon Pasta

The Pioneer Woman doesn't usually disappoint and she didn't with this recipe.
I found this recipe on the Realistic Eats blog. This was simple and quick which is what I am always looking for. I loved the creamy taste of this too.
I changed this up a bit and added some chicken to it. I just threw it in the pan with the olive oil and browned it. When I added the lemon juice and garlic I let it sit in there for another minute our so. I removed it and added the sour cream. I then just mixed it in with the spaghetti in the dish!


Baked Lemon Pasta
Source: Realistic Eats from Pioneer Woman

Ingredients
1 pound Thin Spaghetti
4 Tablespoons Salted Butter
2 Tablespoons Olive Oil
2 cloves Garlic, Minced
1 whole Lemon, Juiced And Zested
2 cups Sour Cream
½ teaspoons Kosher Salt, Or More To Taste
Plenty Of Grated Parmesan Cheese
Flat-leaf Parsley, Chopped
Extra Lemon Juice
Preparation Instructions
Preheat oven to 375 degrees. Cook spaghetti until al dente.
In a skillet, melt butter with olive oil over LOW HEAT. When butter is melted, add minced garlic. Squeeze lemon juice into the pan. Turn off heat.
Add sour cream and stir mixture together. Add lemon zest and salt. Taste, then add more salt if necessary. Pour mixture over drained spaghetti and stir together, then pour spaghetti into an oven safe dish.
Bake, covered, for 15 minutes. Then remove foil and bake for an additional 7 to 10 minutes. (Don’t bake too long or the pasta will dry out.)
When you remove it from the oven, squeeze a little more lemon juice over the top. Top generously with Parmesan cheese, then chopped parsley. Give it a final squeeze of lemon juice at the end.
Serve with crusty French bread and a simple green salad.

Cookies and Cream Rice Krispy Treats


So I have to admit I don't remember ever making rice krispy treats. I mean how could I not have made them before, they are so easy!
I made these for the Colts game last week. It took about 3 minutes to whip these things up!


Cookies and Cream Rice Crispy Treats
Source: Picky Palate
4 Tablespoons Butter
4 Cups mini marshmallows
8 Cups rice crispy cereal
8 oz bag mini Oreo cookies

1/2 Cup chocolate chips, melted

1. Place butter and marshmallows into a large microwavable bowl. Microwave for a few minutes until marshmallows puff up nice and large. Remove and stir in cereal and Oreos. Pour into a large 9×13 inch baking dish. With the back of a large spoon that’s sprayed with cooking spray press and smooth treats. Drizzle melted chocolate over top and let cool. Cut into squares.

Monday, January 18, 2010

Chocolate Mousse Torte

We celebrated my moms' birthday yesterday. I was in charge of bringing dessert! I have so many dessert ideas I want to try it was hard to choose one. I went with this torte since I know my mom likes anything chocolate. I on the other hand don't care for chocolate all that much so I didn't taste this but it was given a great review! This was super simple to make and I was so excited when I flipped it out of the pan that it stayed together!

Chocolate Mouuse Torte
Source: Lindsey's Kitchen

Ingredients
37 Vanilla Wafers, divided
4 squares Baker's Semi-Sweet Chocolate, divided
2 pkg. (3.9 oz. each)Chocolate Instant Pudding
2 cups plus 2 Tbsp. cold milk, divided
1 tub (8 oz.) Cool Whip, thawed, divided
1 pkg. (8 oz.)Cream Cheese, softened
1/4 cup sugar
Fresh Strawberries

Directions
Stand 16 wafers around inside edge of 9-inch round pan lined with plastic wrap. Melt 3 chocolate squares as directed on package.

Beat pudding mixes and 2 cups milk in medium bowl with whisk 2 min. Add melted chocolate; mix well. Stir in 1 cup cool whip; pour into prepared pan.

Beat cream cheese, sugar and remaining milk with mixer until well blended. Stir in 1 cup of the remaining cool whip; spread over pudding. Top with remaining wafers. Refrigerate 3 hours.

Meanwhile, shave remaining chocolate square into curls. Invert torte onto plate. Remove pan and plastic wrap. Top torte with remaining cool whip ( so I used all my cool whip and was unable to do this step! oops!), berries and chocolate curls

Sunday, January 10, 2010

Garlic Ranch Biscuit Topped Chicken Pot Pie!


Whew thats a long title! :) So I noticed I only tend to post chicken recipes! My husband only cares for beef and chicken. No pork and very few pasta recipes! So I'm stuck with two options. If we are going to choose beef it's going to be hamburgers or tacos mostly! So all I get is to do is experiment with chicken! Good thing chicken is so versatile and there are so many recipes out there!

This recipe came together of course really quickly! Now I'm not too big on using the cream of whatever soups but decided to go for it with this recipe. It was delicious!

I halved this recipe since it was only for me and leftovers for lunch.

Poppin’ Garlic Ranch Biscuit Topped Chicken Pot Pie
Source: Picky Palate

4 large chicken breasts, cooked and shredded (either bake, crockpot or pressure cook chicken for easy shredding)

1 packet dry Ranch Dressing Mix, reserve 1/2 teaspoon for topping

1/2 teaspoon salt

1/4 fresh cracked black pepper

2 10 oz cans cream of chicken soup

10 oz can cheddar cheese soup

1 Cup chicken broth

1 Cup milk

2 15 oz cans Mixed Veggis, drained

3/4 Cup crumbled bacon pieces, already cooked

1 Cup shredded cheddar cheese

1 6 count can Pillsbury Homestyle Biscuits

1/2 teaspoon Lawry’s Garlic Salt

1/2 teaspoon reserved dry Ranch Dressing Mix

1/2 Cup shredded cheddar cheese

Cholula Hot Sauce to top, if desired

1. Preheat oven to 350 degrees F. Place shredded chicken into a large mixing bowl. Sprinkle in ranch mix (reserve 1/2 teaspoon for later), salt and pepper. Toss to combine seasonings.

2. In a large rimmed skillet or dutch oven, place soups, broth and milk over medium heat; whisk until combined. Stir in mixed veggis then shredded chicken. Transfer to a large 9×13 inch baking dish sprayed with cooking spray. Sprinkle bacon and cheese over top.

3. Open biscuits and place onto wax paper. Cut each biscuit into 10 little triangle pieces (cut biscuit in half then cut each half into fifths). Place little pieces of biscuit over top of chicken mixture until it’s all covered. Sprinkle biscuits with remaining ranch dressing mix, garlic salt and 1/2 Cup cheese. Bake for 40-50 minutes or until golden brown and biscuits are cooked through underneath. Cover with foil the last 25 minutes of baking to prevent too much browning. Let cool for 10 minutes then serve. Serve with Cholula hot sauce if you like it spicy! Enjoy.

8 servings

Saturday, January 9, 2010

Garlic Cream Chicken

I know I haven't been too great at posting lately! I am still cooking but haven't had much energy to try new things. I am experiencing extreme tiredness and I haven't had any energy lately. Since I have been feeling this way I have been on the lookout for easy and quick recipes. This recipe definitely fit the bill. Chad wasn't home the night I made it but it just gives me an excuse to make it again soon. I know it is something he will really like!


Garlic Cream Chicken and Rice
Source: Burnt Toast who Adapted it from Elizabeth's Cooking Experiments, which she adapted from www.adamandmonika.com

6 cloves garlic, pressed (I only used 2)
4 chicken cutlets (or 2 full size breasts)
salt & freshly ground pepper
1 1/2 tbsp butter
1 1/2tbsp olive oil
1/2 cup chicken stock
1 tbsp flour
1/2 cup heavy cream
1/4 cup fresh grated parmesan cheese
flat leaf parsley, rough chopped, for garnish
cayenne pepper, sprinkled over the top


Season chicken liberally with salt & pepper. Heat the butter and oil n a large deep pan over medium heat. Sauté chicken until nicely browned (~5 min per side). Chicken does not have to be fully cooked at this point. Transfer chicken to a plate and get the rice cooking.


Add garlic to the pan, lower heat to medium, and sauté until soft. Be careful not to burn the garlic. Add stock and bring to a boil. Return chicken to the pot. Cover and simmer for 30 minutes. Remove chicken to a platter and cover with foil.

Add cream and boil for about 3 minutes. Plate rice, sprinkle parmesan cheese over the rice. Add a little sauce then chicken and more sauce. Top with parsley and sprinkle with cayenne pepper.

Sunday, January 3, 2010

Pizza Pizza

I have not been very daring or successful when it comes to making homemade pizza. I usually use a pre-made crust as I have not been too brave when it comes to working with yeast. I also haven't found a sauce that Chad likes they always seemed to make him sick somehow. Well I think this recipe was finally a winner!

This pizza turned out great. The only downside was that it did take some time to put it all together. I also found out I won't be winning any pizza tossing contests anytime soon. My pizzas barely resembled a circle!!
I hope you enjoy this recipe!


Pizza:
Source:Jaime Cooks

Dough:
•2 tablespoons olive oil, plus extra for rising
•½ teaspoon dried herbs, i.e. oregano
•22 ounces (4 cups) bread flour
•1¾ teaspoons salt
•1 teaspoon sugar
•2 teaspoons instant yeast
•¼ cups white wine (I used chicken stock)
•1½ cups water
•cornmeal for dusting

Sauce:
•1 (28-ounce) can diced tomatoes, drained
•salt and pepper
•5 cloves garlic, roasted*
•2 Tbsp to ¼ cup fresh basil, torn

Assembly:
•10 ounces (2½ cups) part-skim mozzarella, shredded or sliced
•2 ounces (1 cup) parmesan, grated
•toppings of your choice, such as:
◦Sausage – hot, mild, pork, turkey, chicken, etc.
◦Pepperoni
◦Bacon
◦Ham
◦Chicken
◦Bell Peppers
◦Onions
◦Mushrooms
◦Black Olives
◦Diced Tomatoes
◦Jalapeño
◦Pineapple
◦Basil
◦Fresh Mozzarella

Garlic Bread:
•6 cloves garlic, roasted*
•6 Tbsp butter, room temperature
•1 tsp Kosher salt, added to taste
•¾ cup pizza sauce
•¼ tsp red pepper flakes

Directions:


For the dough:
1.Heat the oil and herbs in a small saucepan over low heat until fragrant. Mix in the water and wine.

2.In the bowl of a stand mixer fitted with the dough hook, mix the flour, salt, sugar, and yeast. With the mixer on low speed, pour in the liquid mixture. Continue mixing on medium-low speed until the dough comes together, and then knead on medium-low speed for 8 minutes, until the dough is smooth and elastic. Add more flour or water as necessary to form a dough that is sticky but does not cling to the sides of the bowl. When the mixer is running on medium-low speed, the dough should not stick to the bottom of the bowl.

3.Drizzle about 2 Tbsp of olive oil into the bowl. Rub your hands on the sprayed bowl to coat them with oil, then quickly form the dough into a ball. Place the ball of dough in the bowl and cover with plastic wrap.

4.Either set the dough aside to rise at room temperature, which will take 1½ to 2 hours, or refrigerate it until the next day. If it’s chilled overnight, it will take about 5 hours at room temperature to warm and finish rising. You can also reduce the yeast to ½ teaspoon and let the dough rise on the counter for about 8 hours after it has been chilled overnight.

For the sauce:
1.Pulse the tomatoes in a food processor 10-12 times, until they’re pureed.

2.Transfer them to a fine-mesh strainer set over a large bowl and let them drain, stirring occasionally for at least 10 minutes. You can get away with less time if you actively stir and press the tomatoes through the strainer; if you wait longer, you can stir less.

3.Transfer the tomatoes from the strainer back to the bowl of the food processor or previous bowl, and roasted garlic, basil, and salt and pepper to taste. Start adding to the sauce slowly, tasting along the way. You can always add in more seasoning, but once it’s in there, . . . well, you know the rest.

Assembly:
1.Place a pizza stone on the bottom rack of the oven and preheat the oven to 500ºC. Place the garlic on the hot pizza stone for 3-4 minutes or until fragrant.

2.Divide the dough and shape each portion into a ball. You have a few options of how to divide it. It makes enough dough for three 12-inch pizzas. However, I always cut it in half and freeze half. Then I divide the remaining dough into two more parts, one twice the size of the other. I make the larger one into pizza and the smaller into cheese bread (no sauce or toppings). Let the balls of dough relax for 10-30 minutes.

3.Using tongs remove the garlic from the oven and let it cool for a few minutes. Mince.

4.Work with one ball of dough at a time on a lightly floured surface. Flatten the dough, then pick it up and gently stretch it out, trying to keep it as circular as possible. Curl your fingers and let the dough hang on your knuckles, moving and rotating the dough so it stretches evenly. If it tears, just piece it together. If the dough stretches too much, put it down and gently tug on the thick spots.

5.Dust a pizza peel lightly with cornmeal and transfer the round of dough to the peel. Rearrange the dough to something reasonably circular; stab it several times with a fork. Add 1/3 of each of the garlic, sauce, and cheese, followed by toppings of your preference, and then transfer to a hot pizza stone.

6.Bake for 8-10 minutes, until the cheese is bubbling and the crust is spotty brown. Let the pizza cool on the peel for about 5 minutes before slicing and serving. Repeat with the remaining ingredients.

Garlic Bread Sticks:
1.If using hand blender, place garlic, salt, and butter into blender cup and blend until smooth. Otherwise, mince garlic as finely as possible and blend into butter and salt. You’ll have to taste the mixture when you first make it, as you want the salt to bring out the garlic flavor rather than overpower it.

2.Shape the reserved dough into a rectangle of your desired thickness. I usually aim for a 11×14″ sized sheet.

3.Spread butter mixture over dough, leaving a slight edge. If you wanted a cheesy bread, you could sprinkle with mozzarella and/or parmesan at this point.

4.Bake for 10 minutes at 500º. Allow to cool slightly before cutting.

5.If you want a dipping sauce, simply use some extra pizza sauce. I give ours a kick by blending in some crushed red pepper flakes.

Notes:
•You can substitute up to 7 ounces (about 1½ cups) of whole wheat flour for the white bread flour, but expect longer rising times and a more stubborn dough. But if you’re patient during shaping, your crust will be just as light and crisp as dough made completely with white flour.

•Another important aspect of pizza crust is how you work with it. Be gentle with your dough. I need to stress that you really don’t want to use a rolling pin. Pull and stretch the dough. Pick it up, hanging the edges on your knuckles, and let gravity do the work. If it’s tearing or thinning unevenly, put it back down and just pull at the thicker parts. If it’s fighting you, walk away for five minutes to let it relax.